|
|
It is recommended to use encrypted communication with MiScout server via web to avoid sending user credentials in the open format. By default, MiScout is not configured to support the encrypted communication via web. Therefore, to configure such communication, several steps are required to be done by a user.
Furthermore, to ensure secure communication via web a special certificate type is required, which must be issued by the certificate authority. Optionally, the so called "self-signed" certificate could be used.
For the sake of configuring the appropriate certificate and making it ready for use by MiScout, user has to take some basic steps. And further in this chapter we will dwell on creating required certificates for MiScout SCADA presenting a step by step description of this workaround.
1. Receive a signed certificate from the issuer:
In an ideal scenario, the above-mentioned items are retrieved as a single file chain. Otherwise, a user is required to perform some preliminary work.
The step by step description of this workaround is described below.
2. To proceed, this certificate has to be imported to the Java keystore using the keytool utility.
3. There are few options which must be taken into account:
For creating a keystore, take the following steps.
1. If certificates are retrieved as the *.p12 file, you can go directly to Step 3.
2. In case certificates are retrieved as separate files, it is necessary to create the *.p12 file.
You can create the *.p12 file, by executing the following command:
openssl.exe pkcs12 -export -name swc -in certificate.crt -inkey privatekey.key -out keystore.p12 -name "miscout-tomcat"
certificate.crt - a signed certificate issued by the authority.
privatekey.key - private key issued by the authority.
Openssl is available in the following folder: <MiScoutRoot>\OpenVPN\bin.
While the command is being executed, you will be asked to enter a password.
Note 1. Keep in mind, the password you enter must match the password which is also valid for the private key.
Important Note. Both password and private key should be provided by the certificate issuer.
A resulting file named "keystore.p12" proves that the command has been executed successfully.
3. Create the Java keystore, by executing the following command from the java folder available at <MiScout Root>\jre\bin:
keytool -import -alias root -keystore keystore.jks -trustcacerts -file root.crt
root.crt - root certificate issued by the authority.
Note. Command execution may fail, if no Java is installed and no proper entries have been made into the system variables.
The above command creates a Java keystore. You will be asked about the password. Use the same password as in Step 2 (for more details, see also Note 1.).
4. Import *.p12 certificate storage to the Java keystore:
keytool -importkeystore -srcalias miscout-tomcat -destalias miscout-tomcat -srckeystore keystore.p12 -srcstoretype PKCS12 -destkeystore keystore.jks -deststoretype JKS
Use the same password as specified in Step 2 and Step 3 (for more details, see also Note 1.).
5. Export certificate from the keystore, by executing the following command:
keytool -exportcert -rfc -file clientcert.pem -keystore keystore.jks -alias miscout-tomcat
6. Perform the following two actions to enable editing of clientcert.pem file.
7. To import the retrieved chain to the keystore, the following command has to be executed:
keytool -importcert -alias miscout-tomcat -file clientcert.pem -keystore keystore.jks
1. Copy the keystore.jks file to the folder: <MiScout>\Tomcat.
2. Alias, in the keystore, by default, should be miscout-tomcat. Otherwise, make proper settings for the property: com.mitateknik.web.ssl.keystore.alias.
3. Default password for the keystore in MiScout is "MiScoutSCADAKeyStore". Otherwise, redefine it using the property com.mitateknik.web.ssl.keystore.password.
4. Activate SSL in Tomcat by adding the following property: com.mitateknik.web.ssl.port=443.
Note. Inbound connection for TCP ports 80 and 443 should be allowed by the Firewall, if other ports are not specified in the properties.
Due to access to Azure being possible only under protected connection you must enable https-protocol for MiScout.
Note. In addition Azure works correctly when web-server and web-client are located on the same PC and communication proceeded via localhost (IP: 127.0.0.1) - in that case https communication is not needed.
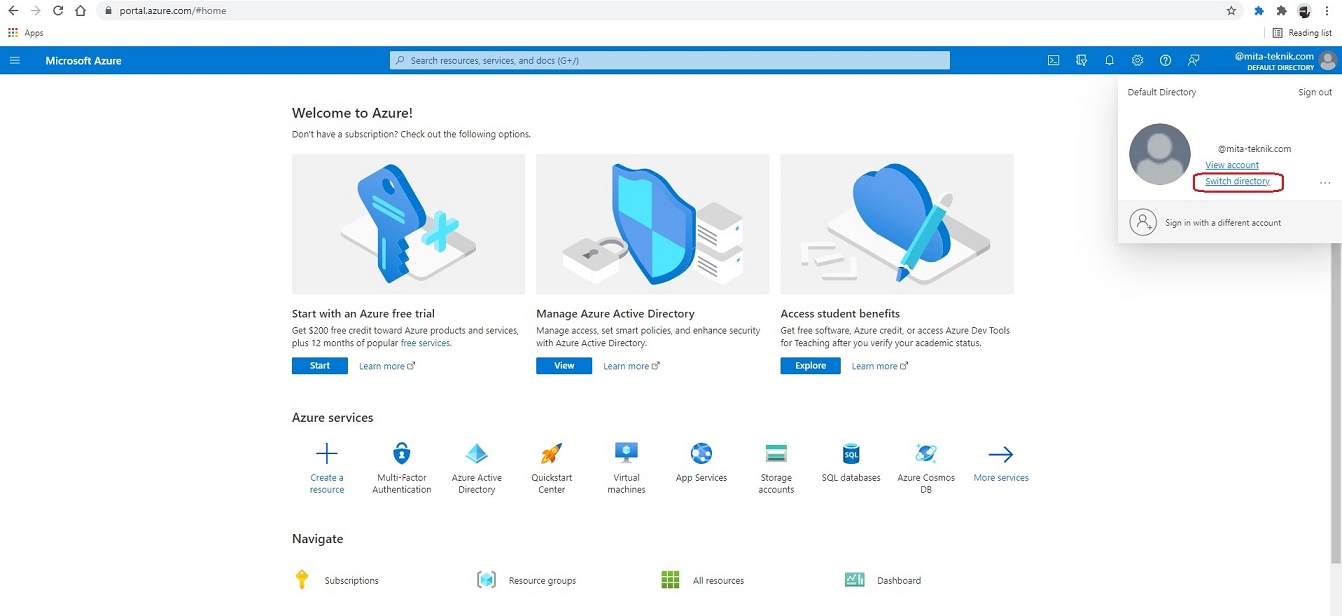
Open MS Azure portal. Login and select appropriate directory.
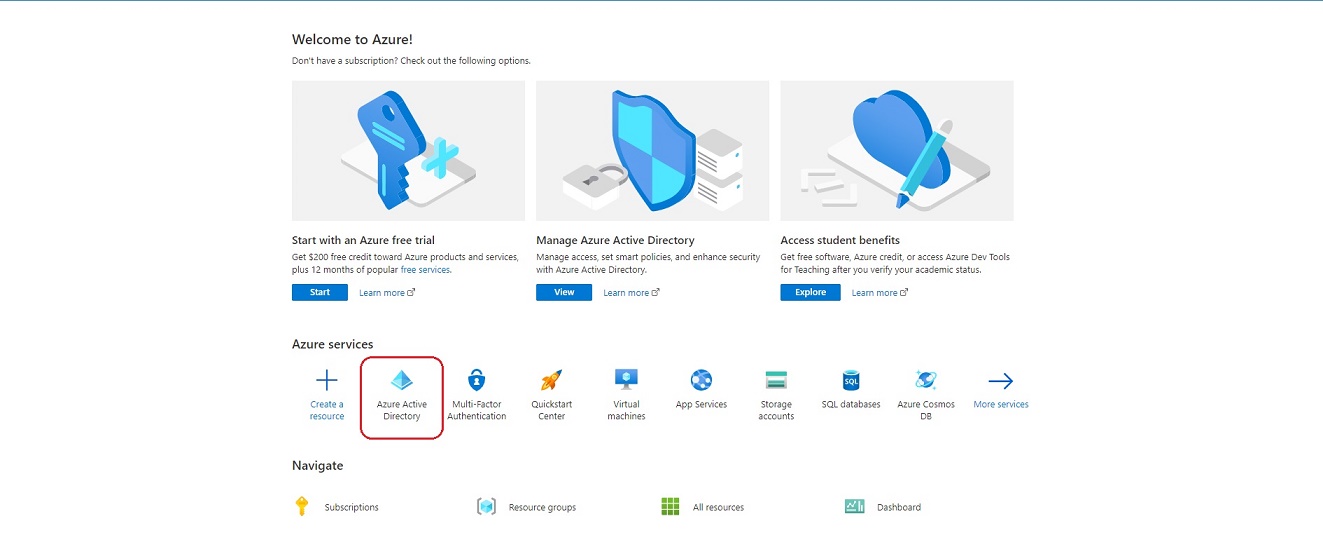
Open Azure active directory.
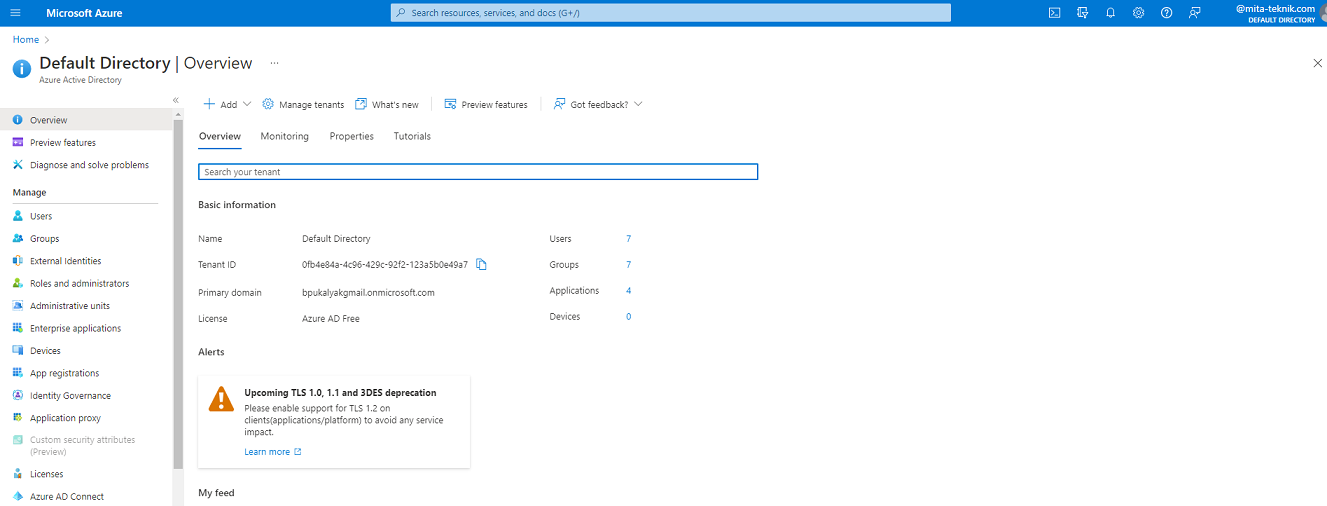
Select “App registrations” option.
There you can see already registered applications or you can register new one.
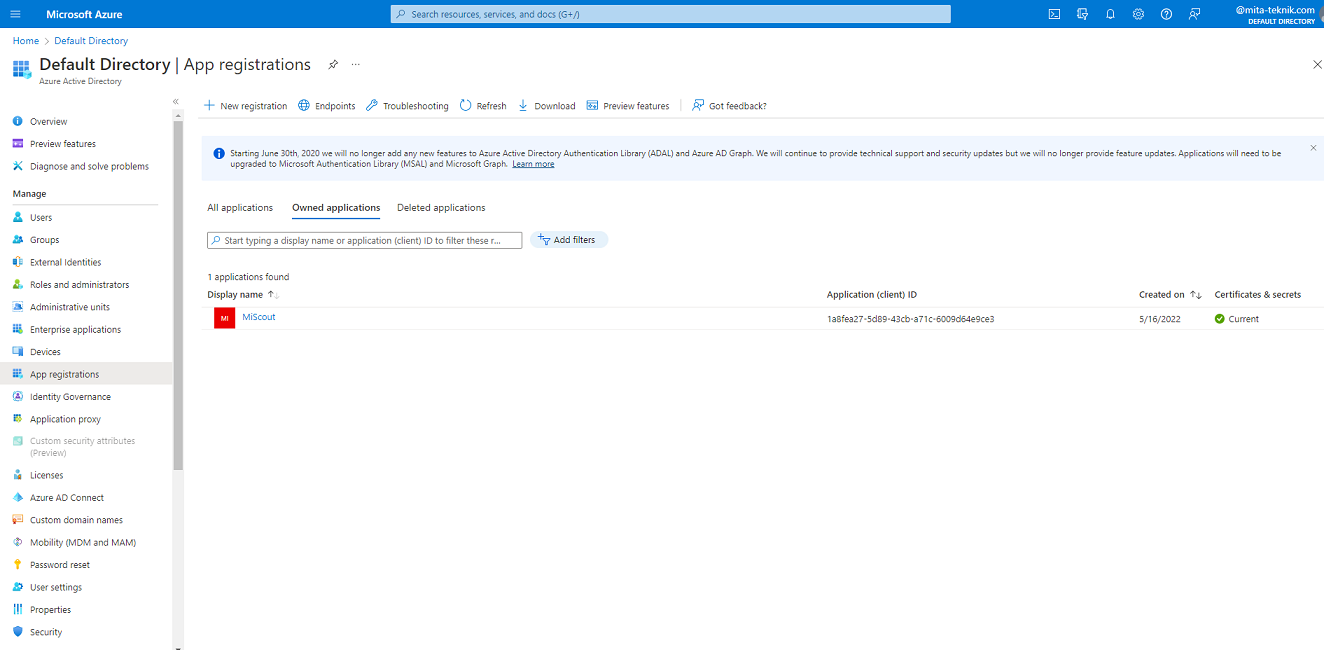
After that you need to copy information about Application (client) ID and Directory (tenant) ID and put it into variables com.mitateknik.azure.clientid and com.mitateknik.azure.tenantid appropriately in scope of MitaProps.properties file.
Than you need to click on the your application name and in Authentication section you must add URI where the MiScout server is located.
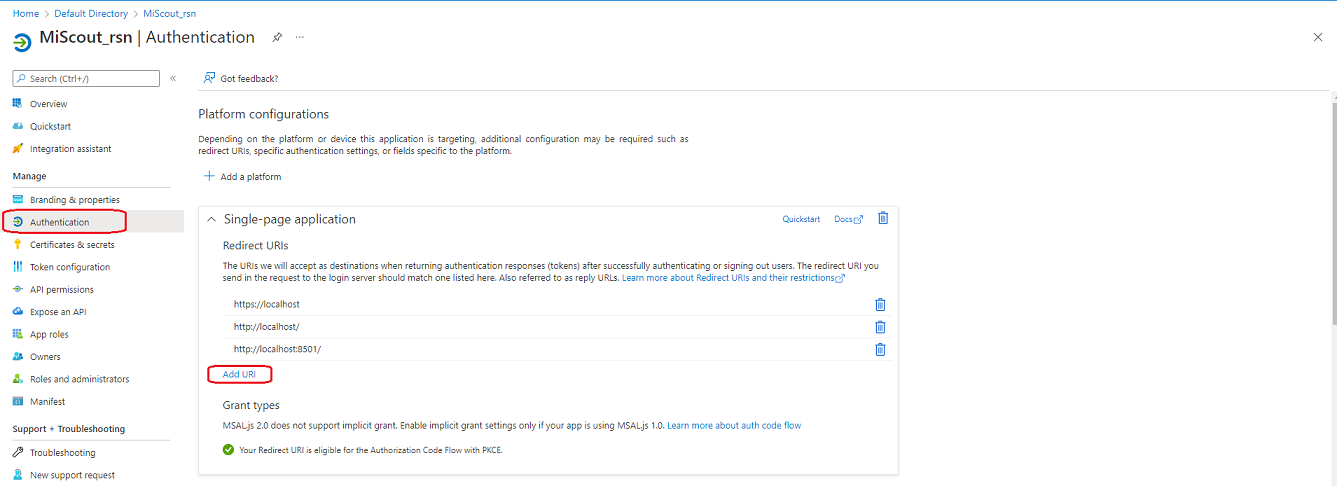
Note. you can add several URIs in case if there are multiple MiScout installations.
Add certificate in the Certificates & secrets section.
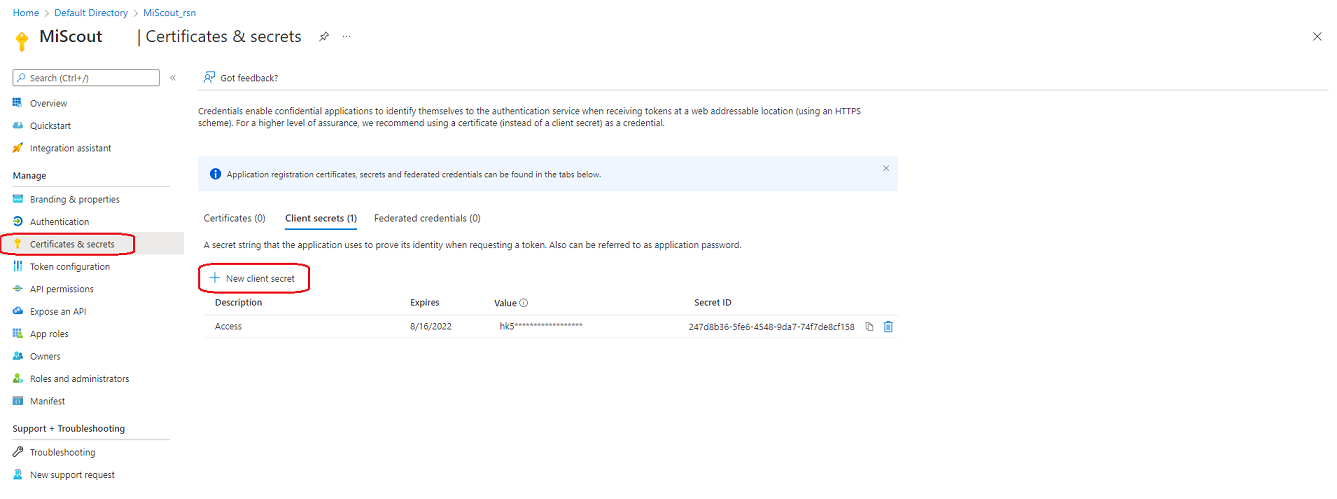
Copy generated Value and put it into com.mitateknik.azure.secret.accessid variable in scope of MitaProps.properties file.
Note. Due to Microsoft Azure policy Value will be available only temporary so you need to copy it right after certificate creation.
By default, when a user logs out from Azure, they must choose their account in an additional pop-up window. If this is annoying, you can configure a promptless logout.

Note. for more details refer: https://github.com/AzureAD/microsoft-authentication-library-for-js/blob/dev/lib/msal-browser/docs/logout.md#promptless-logout
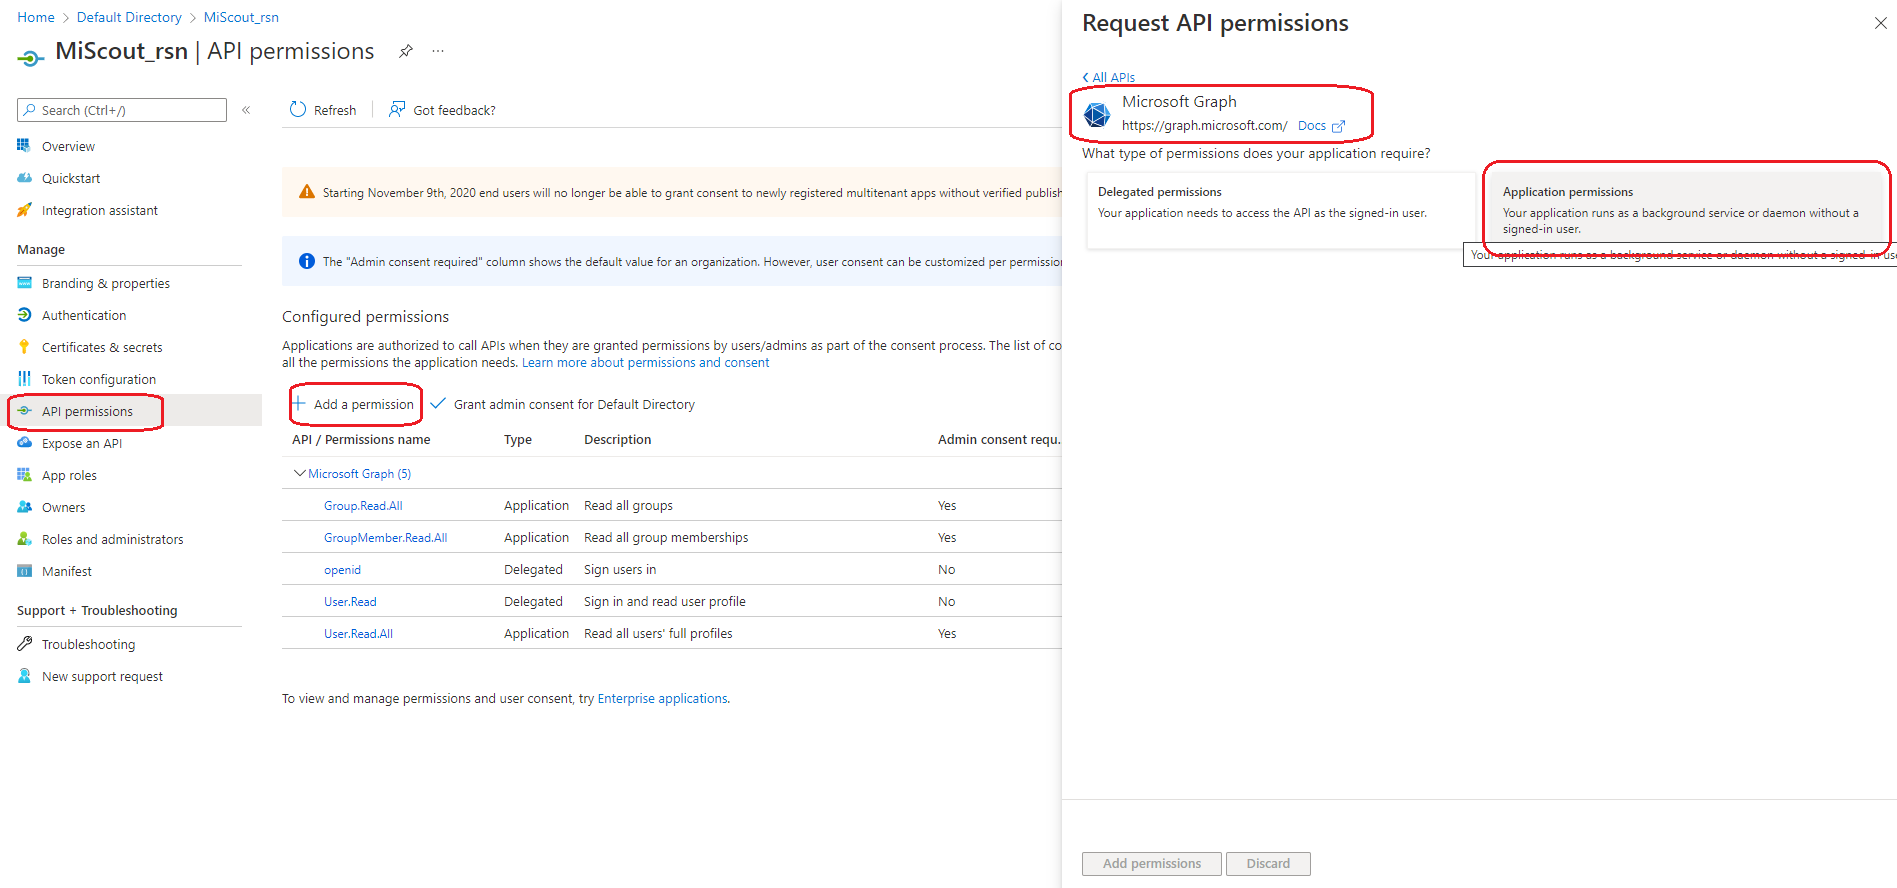
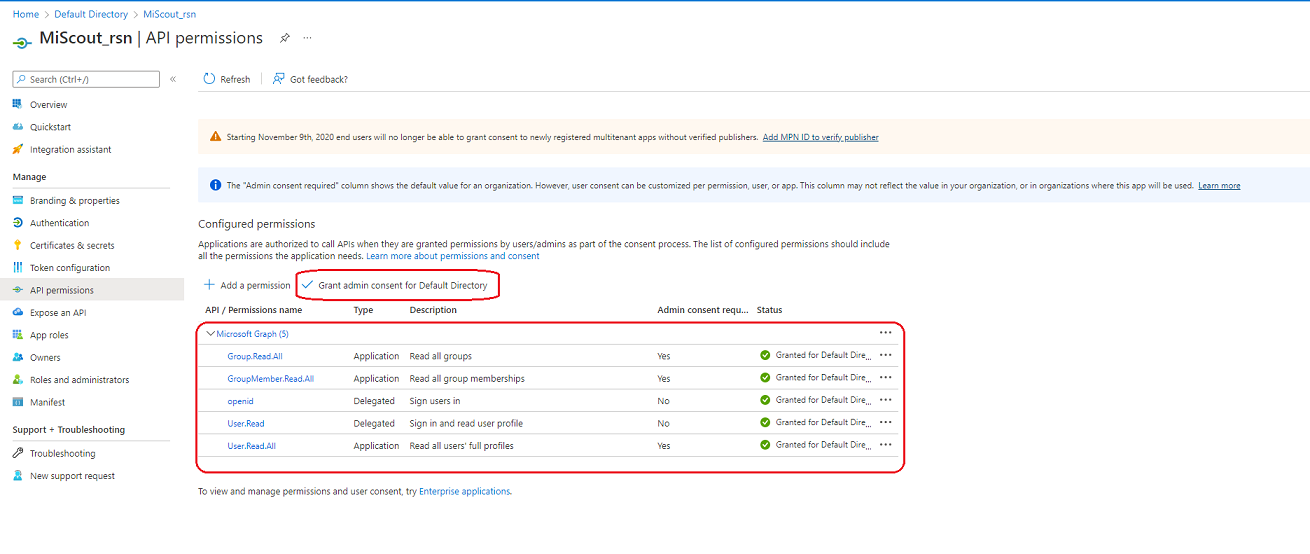
To be able to not only login via Azure you should add the appropriate API permissions.
And finally you need to set com.mitateknik.azure property in true.
So, to enable login via Azure you need to setup https-communication for MiScout (or work on local PC) and add following variables into MitaProps.properties file like this:
com.mitateknik.azure = true.
com.mitateknik.azure.clientid=5fe1313a-0a80-444e-b10b-ebb0289bc9f.
com.mitateknik.azure.tenantid=0fb4e84a-4c96-429c-92f2-123ab0e49a7.
com.mitateknik.azure.secret.accessid=ZrD8Q~373.7dgCbPTuo1N61CLjZZeICLgBJ.